Lumen Print Camera Build
The last few weeks have seen me struggling to achieve consistent results with an experimental method of reversal processing black & white photo paper, using a mixture of hydrogen peroxide and citric acid as a bleaching agent. As interesting as that is, the lack of consistent results has me temporarily seeking solace in another experimental photographic technique, one that seems in comparison much easier to tame: lumen prints - technically a paper negative image created by the auto-development action of light itself against grains of silver halides, no chemical processing required.
Lumen prints have been created by artists and other creatives for many years, often using a pinhole camera placed outdoors, pointed at the sky, recording over a long period of time the path of the sun. But using the lumen print process to create more conventional photographs is a bit more esoteric. Just the thing to interest me.
I first heard of this by way of Jorge Otero, a lumen print artist and purveyor of nice wooden lumen print cameras he calls Lumenbox, on Etsy. I wrote a blog article about him recently.
This week I decided to make a more serious lumen camera besides the crude cardboard, duct tape and plastic fresnel lens camera I'd cobbled together earlier. The process requires a fast lens, in order to shorten the othewise lengthy exposure time as much as possible. I looked through my assortment of optics and decided, for an approxiamate 4x5 sized image, that only two lenses would suffice: an improvised binocular lens, of 150mm focal length and a wide-open aperture of f/3; and the original lens to my Speed Graphic camera, the Kodak Ektar 127-f/4.7.
I decided to experiment with the binocular lens on the Speed Graphic, while at the same time I was cobbling together a camera for the Ektar lens. The exposure times used with this process are often 20-30 minutes in bright sun, slow enough to permit me to also work on the camera while shooting some footage for a documentary video on the subject. The binocular lens has a relatively sharp central portion of its image, with the rest all a mess of swirly and cloudy artifacts. Artsy might be a good description. While the Ektar lens is clinically sharp, center to edge.
I had considered building a camera from scratch, but then looked at the stack of pinhole cameras accumulating in one corner of my darkroom. I decided on a wooden craft box, purchased some years ago from Hobby Lobby and made into a pinhole camera, might fit the bill. It had about the required size and the sturdiness of wooden construction over many of my other cameras that are built from foam core board.
I drilled a hole in the front of the box big enough for the Ektar lens, then proceeded to figure out how best to mount it. It turns out that the box would be a bit too deep for achieving infinity focus with the lens mounted to the front, so I had to resort to mounting the lens inside the front of the box, mounted backwards to gain access to the shutter. A sliding section, made from salvaged foam core board and hot glue, made for a convenient focusing method. The lid of the craft box fits snuggly over this sliding section. I'm using a thin sheet of lucite plastic, sanded smooth on the front side, as a makeshift focusing screen for the camera. I remove the back, focus and compose, then the camera is ready to receive paper.
After a first abortive attempt at making an exposure, in which the paper slipped off the rear flange of the sliding section, I modified it with a thicker flange surface, necessitating a smaller film format size, just about 4" square. A piece of craft paper, taped to the bottom of the flange, serves to hold the bottom edge of the paper in place when loading the camera. It's all experimental, this cobbled-together camera, and will most likely require modifications going forward.
This lumen process is a bit non-intuitive. It uses light-sensitive paper, but because chemical developers are not used, relying instead solely on the auto-development action of light against silver halides, the paper can be handled under subdued lighting with little concern for fogging the paper. Being as Jorge Otero has discovered the process works faster when the paper is wetted with water, I simply took the rear box of the camera into the dark room, cut a sheet to size, wetted it, then carried the paper through the house to the front porch, where the camera was situated already focused on the subject. I then loaded the paper directly into the box, in bright daylight. And waited. For about an hour - I wanted to ensure good first results.
The auto-development process produces a color change with silver gelatin paper. I'm not enough of a scientist to understand the details, but do know that there are various types of silver halides used in these printing papers, and have seen various tones of browns, yellows, pinks and purples result, depending on the intensity and color of light. Experiments I did last week, using grade 2 paper, fell flat on producing good results; this process requires a high-contrast emulsion, which multi-grade paper provides. I'd advise anyone interested in this process to use both a fast lens, and multigrade paper, pre-wetted with water.
Once exposed, the paper negatives are still light-sensitive. So it's best to store them in some light-proof envelopes or sleeves. I made some crude sleeves from black craft paper and gaffers tape, but there's probably a better solution out there.
This is a hybrid process. To produce a usable image, scanning the negatives and entering into a digital work flow is mandatory; unless the negatives themselves are treated as some esoteric form of fragile paper art object, viewed under subdued lighting. I scan them, then invert the tones to produce a positive. In doing so, the colors also invert, from the warm tones mentioned earlier into blues and greens. One can also convert the image to monochrome and dispense with the color. Personally, I'm a bit torn on which to do. I really like Otero's resulting monochrome images, but there remains something intriguing about the resulting colors that has me interested. In the last image I created yesterday, the inverted positive has blue skies and green leaves on the tree. Weird. Almost like a color process, but I know just enough to know that ain't so. Still, when you see green leaves resulting from black and white paper, it makes you stop and think.
My old flatbed scanner is less than optimal for this process. And I lack completely a photographic quality printer. But this process has me interested in creating fine prints that will do this process justice. More experiments are in order. Best of all, this process is pure fun. With just a bit of waiting time thrown in. Just enough time to sit down at the typewriter and ponder.
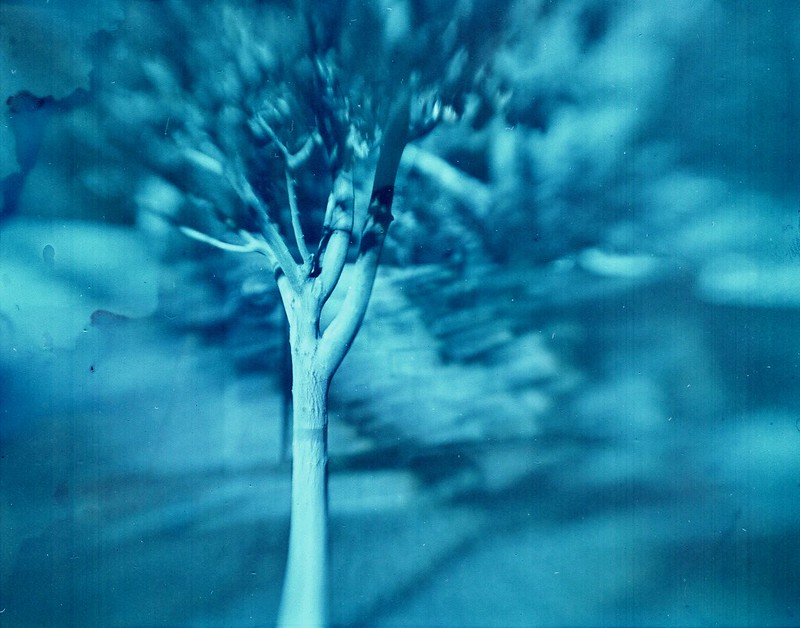
1 hour exposure on Ilford multigrade paper. 150mm-f/3 binocular lens on Speed Graphic.
1 hour exposure on Ilford multigrade paper. 150mm-f/3 binocular lens on Speed Graphic.

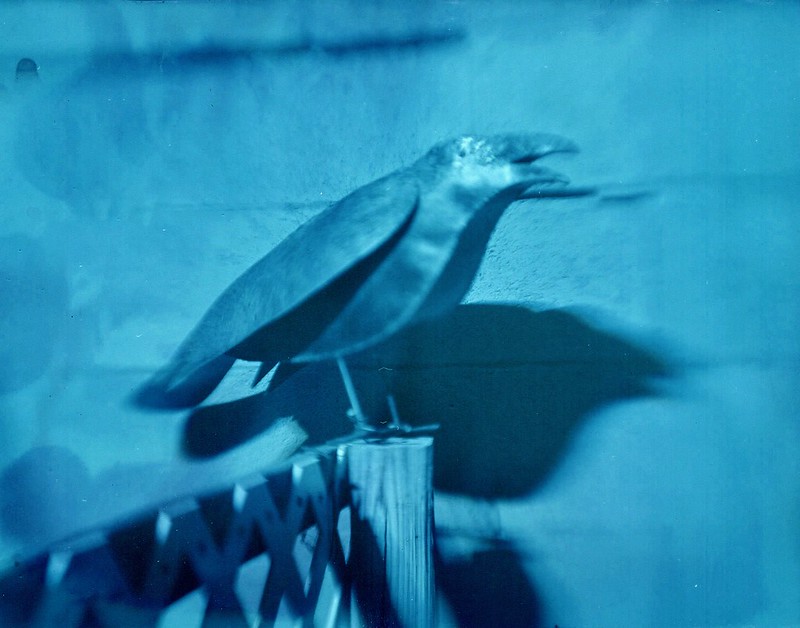
1 hour exposure on Ilford multigrade paper. Kodak Ektar 127-f/4.7 lens in Cinema Lumen Box camera.
Labels: camera making, Lumen prints
posted by Joe V at 12:35 PM
![]()
![]()

1 Comments:
Thank you very much.
The post is fabulous.
Your tests and conclusions are very good.
The color appears when I scan the negative the second time. It is as if the light of the scan influenced the silver gelatin in different ways. I use an Epson scan and on the second scan I active the option to restore color. This I do not control it and many times the results are not good.
I'm working on it.
Best Regards. Jorge.
Post a Comment
<< Home